

 LinkBack URL
 About LinkBacks


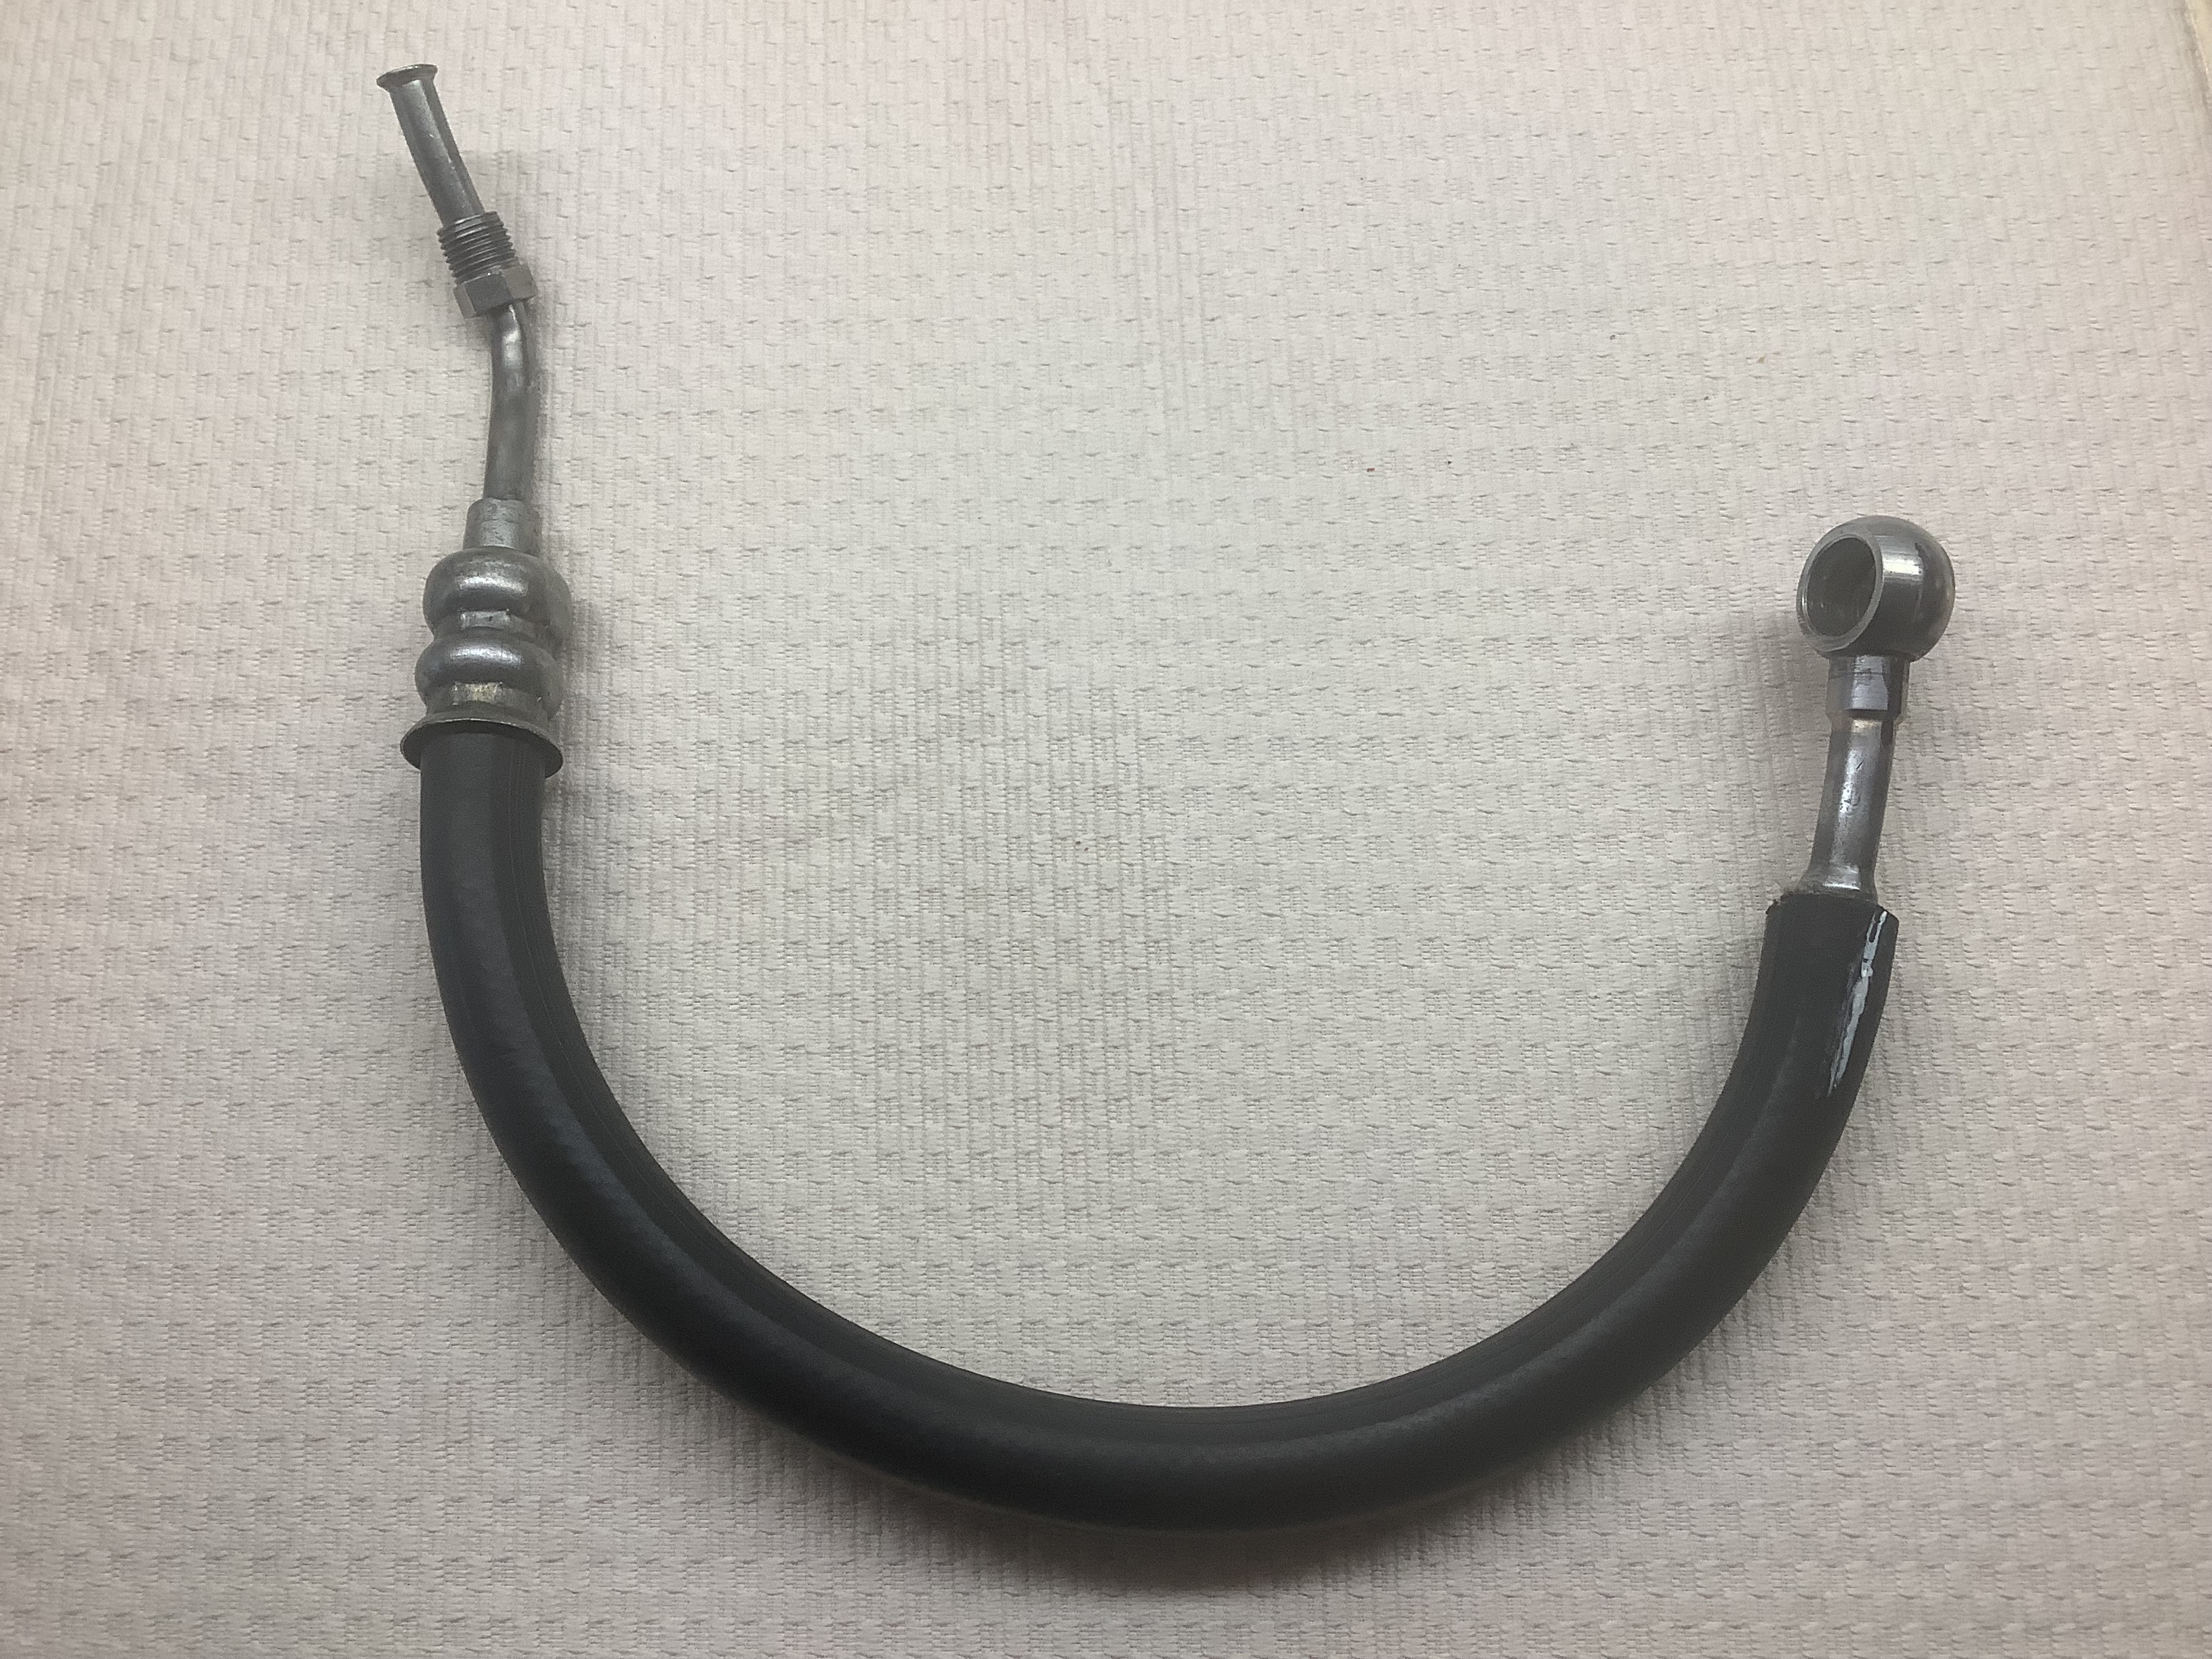
I was searching for a shop or business that could furnish and crimp a ferrule onto a hose assembly. The assembly is going to be used for a Jaguar IFS that I've installed on a 40 Chrysler Coupe.
Hose a'y,
Countless inquiries were made to places like NAPA, AutoZone, Dakota Fluid Power, and various other hydraulic shops; local and elsewhere.
No-one seemed to be able to do the job or just didn't want to.
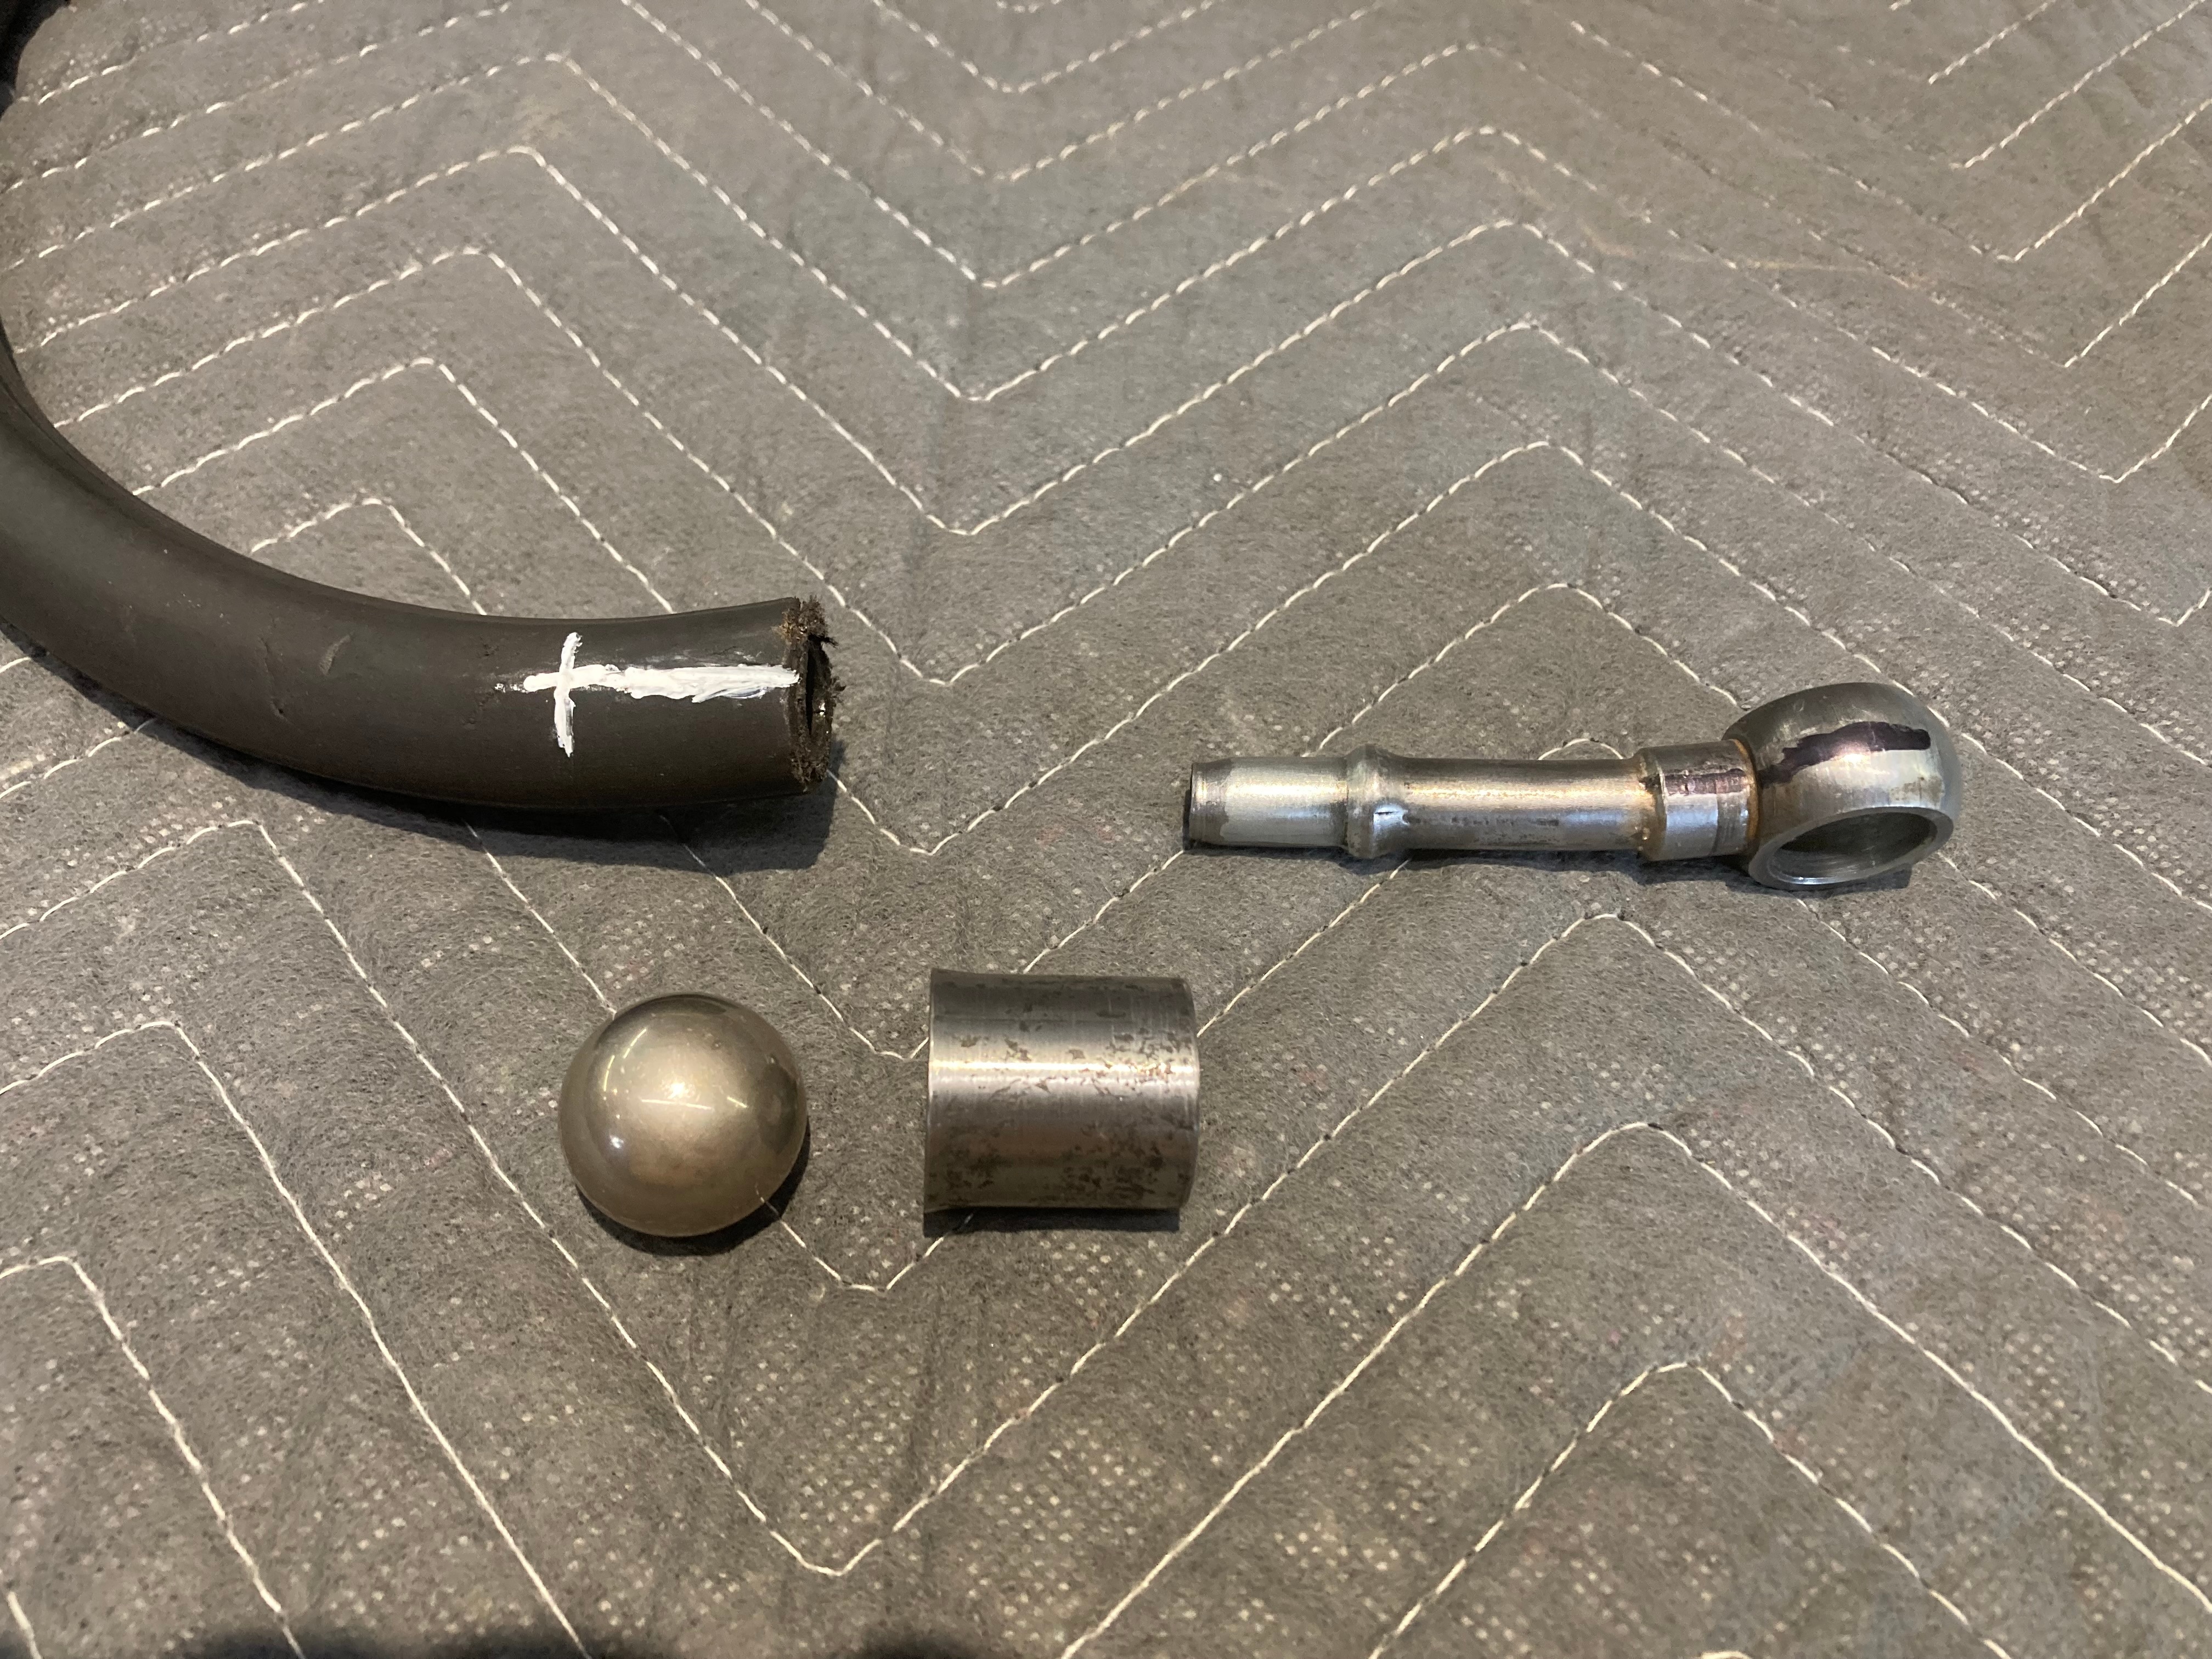
So....I took it upon myself to make the req'd ferrule and crimper.
The ferrule was made from A513 steel as this seemed to be the best for avoiding any cracking when crimped.
A 1/2" schedule 160 pipe nipple was chosen.
A piece was cut to 0.94 and the ID was bored to 0.75 x 0.88 dp; however, the OD was not turned.
The open end was flared slightly using a 7/8" steel ball.
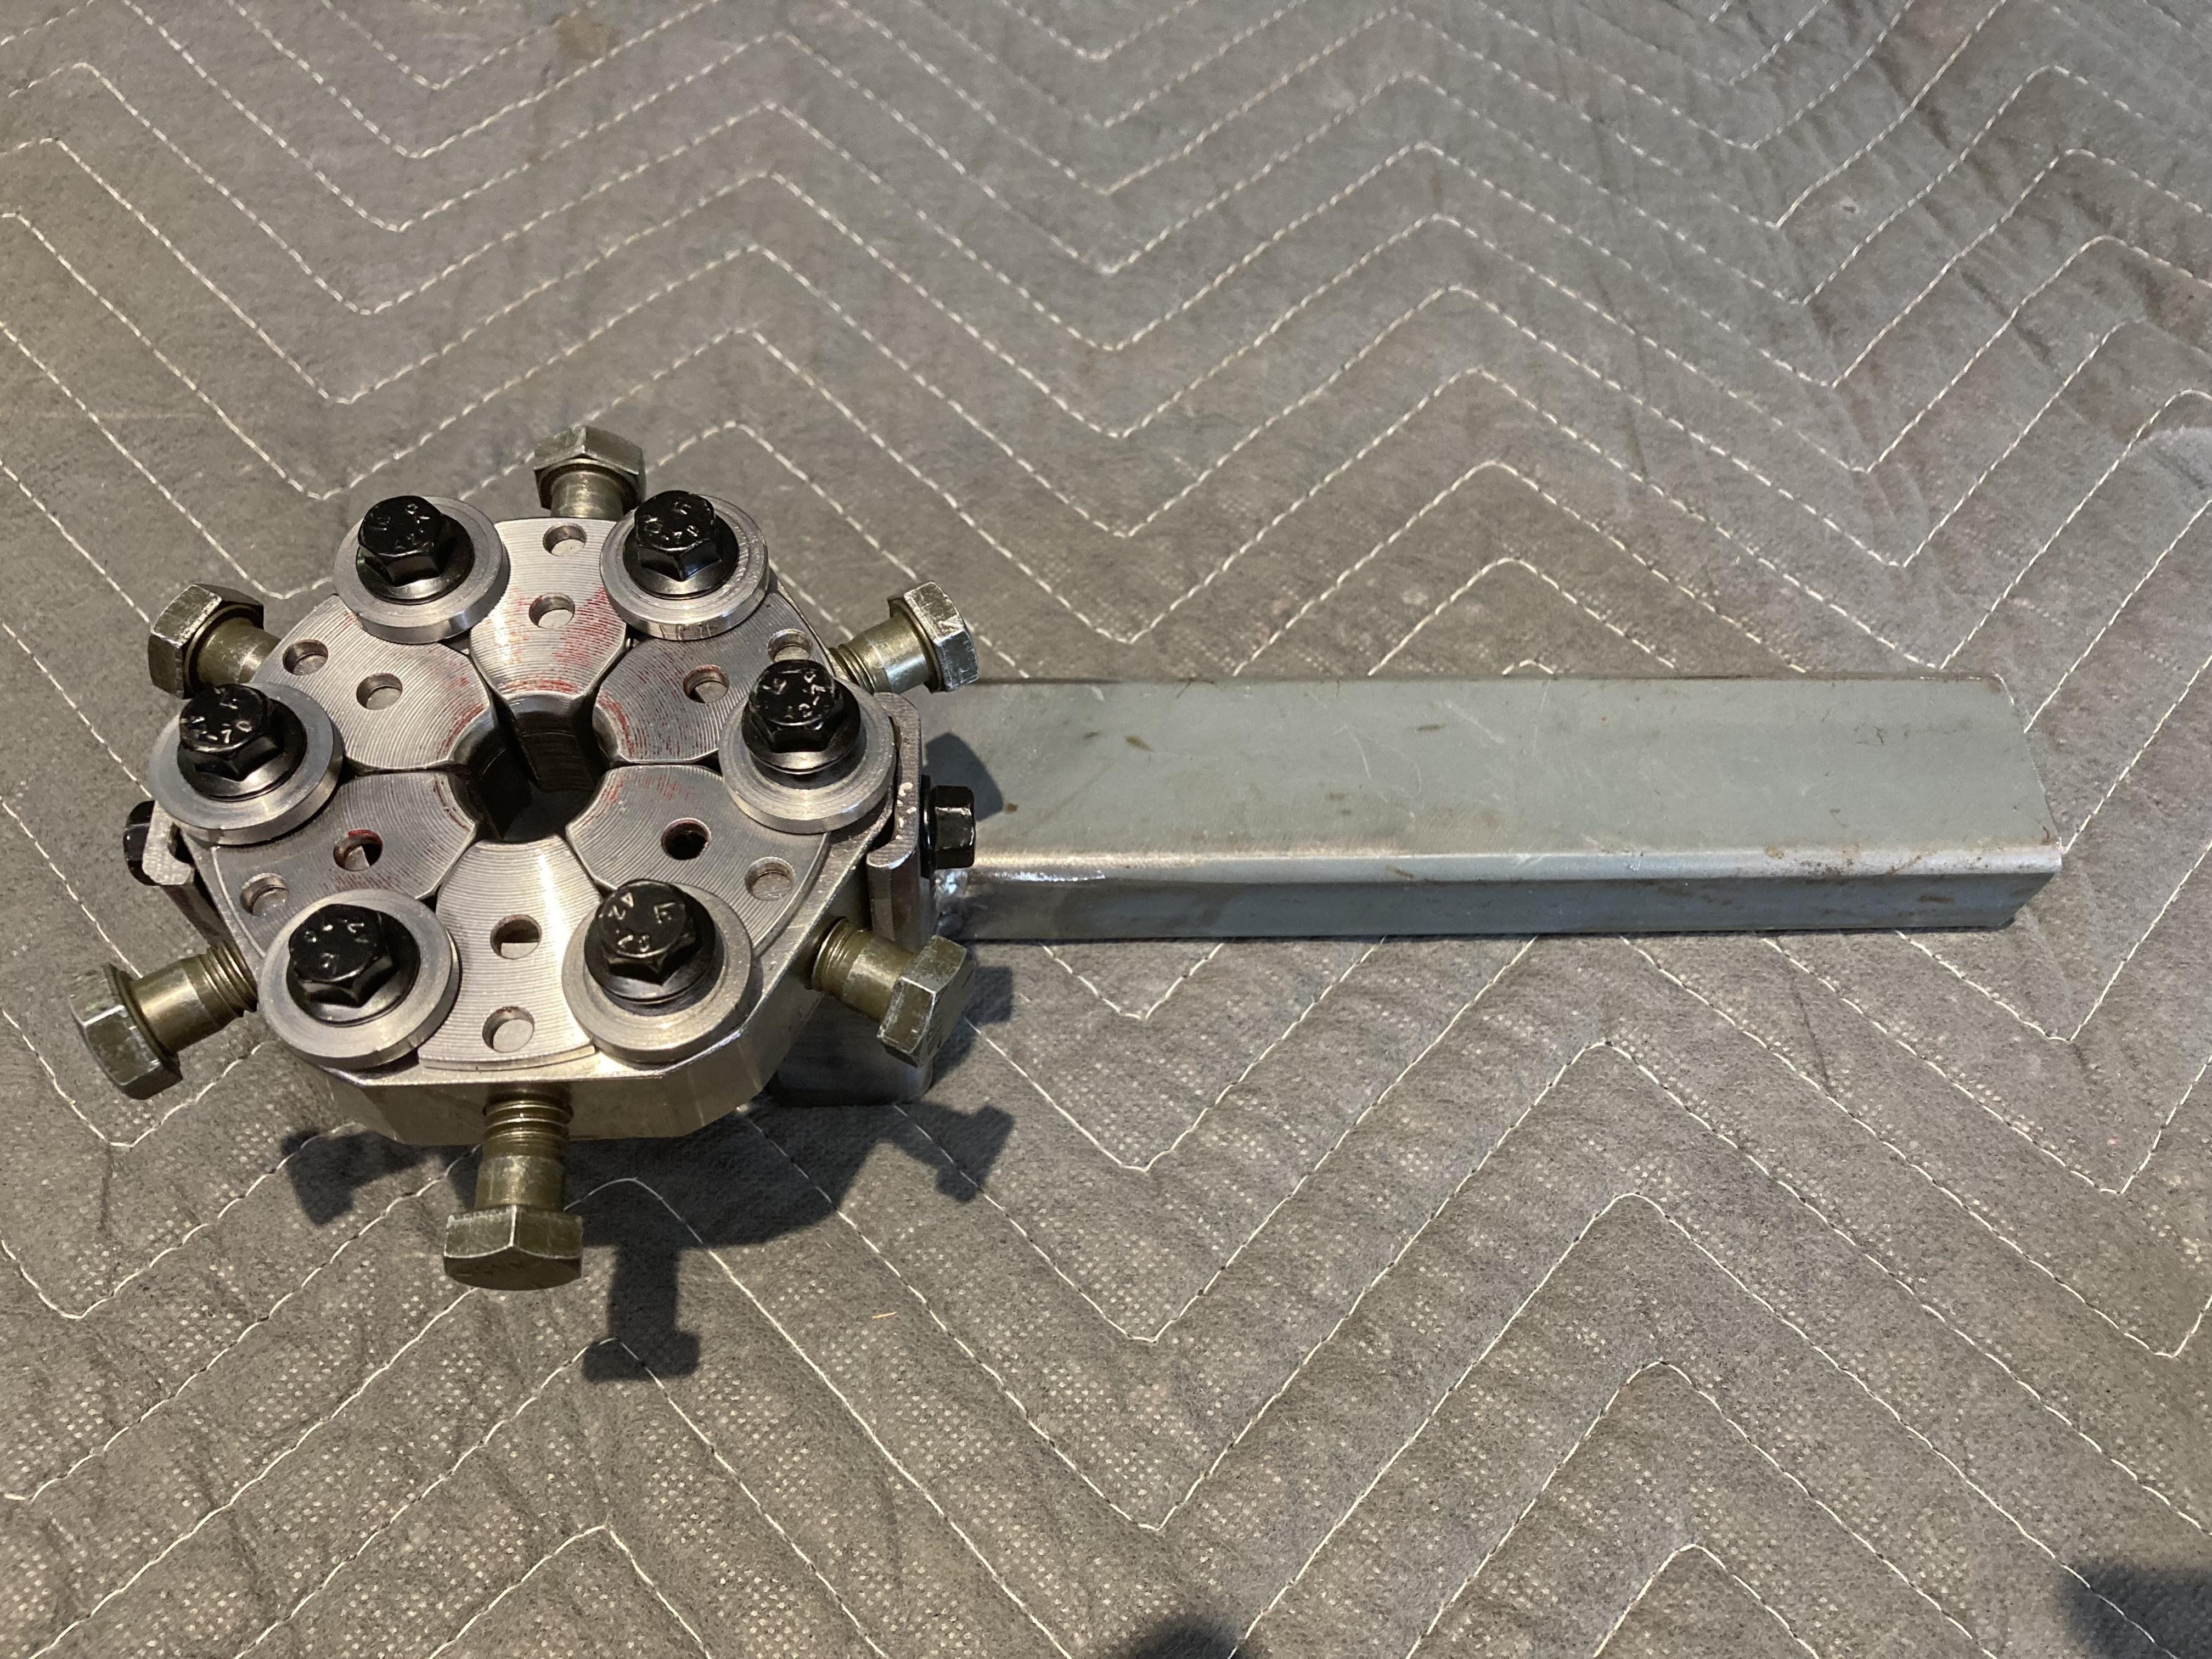
The 6-sided crimper. Making this took some time...haha.
But, I had made something similar back in the 70's for a company that made farm sprayers.
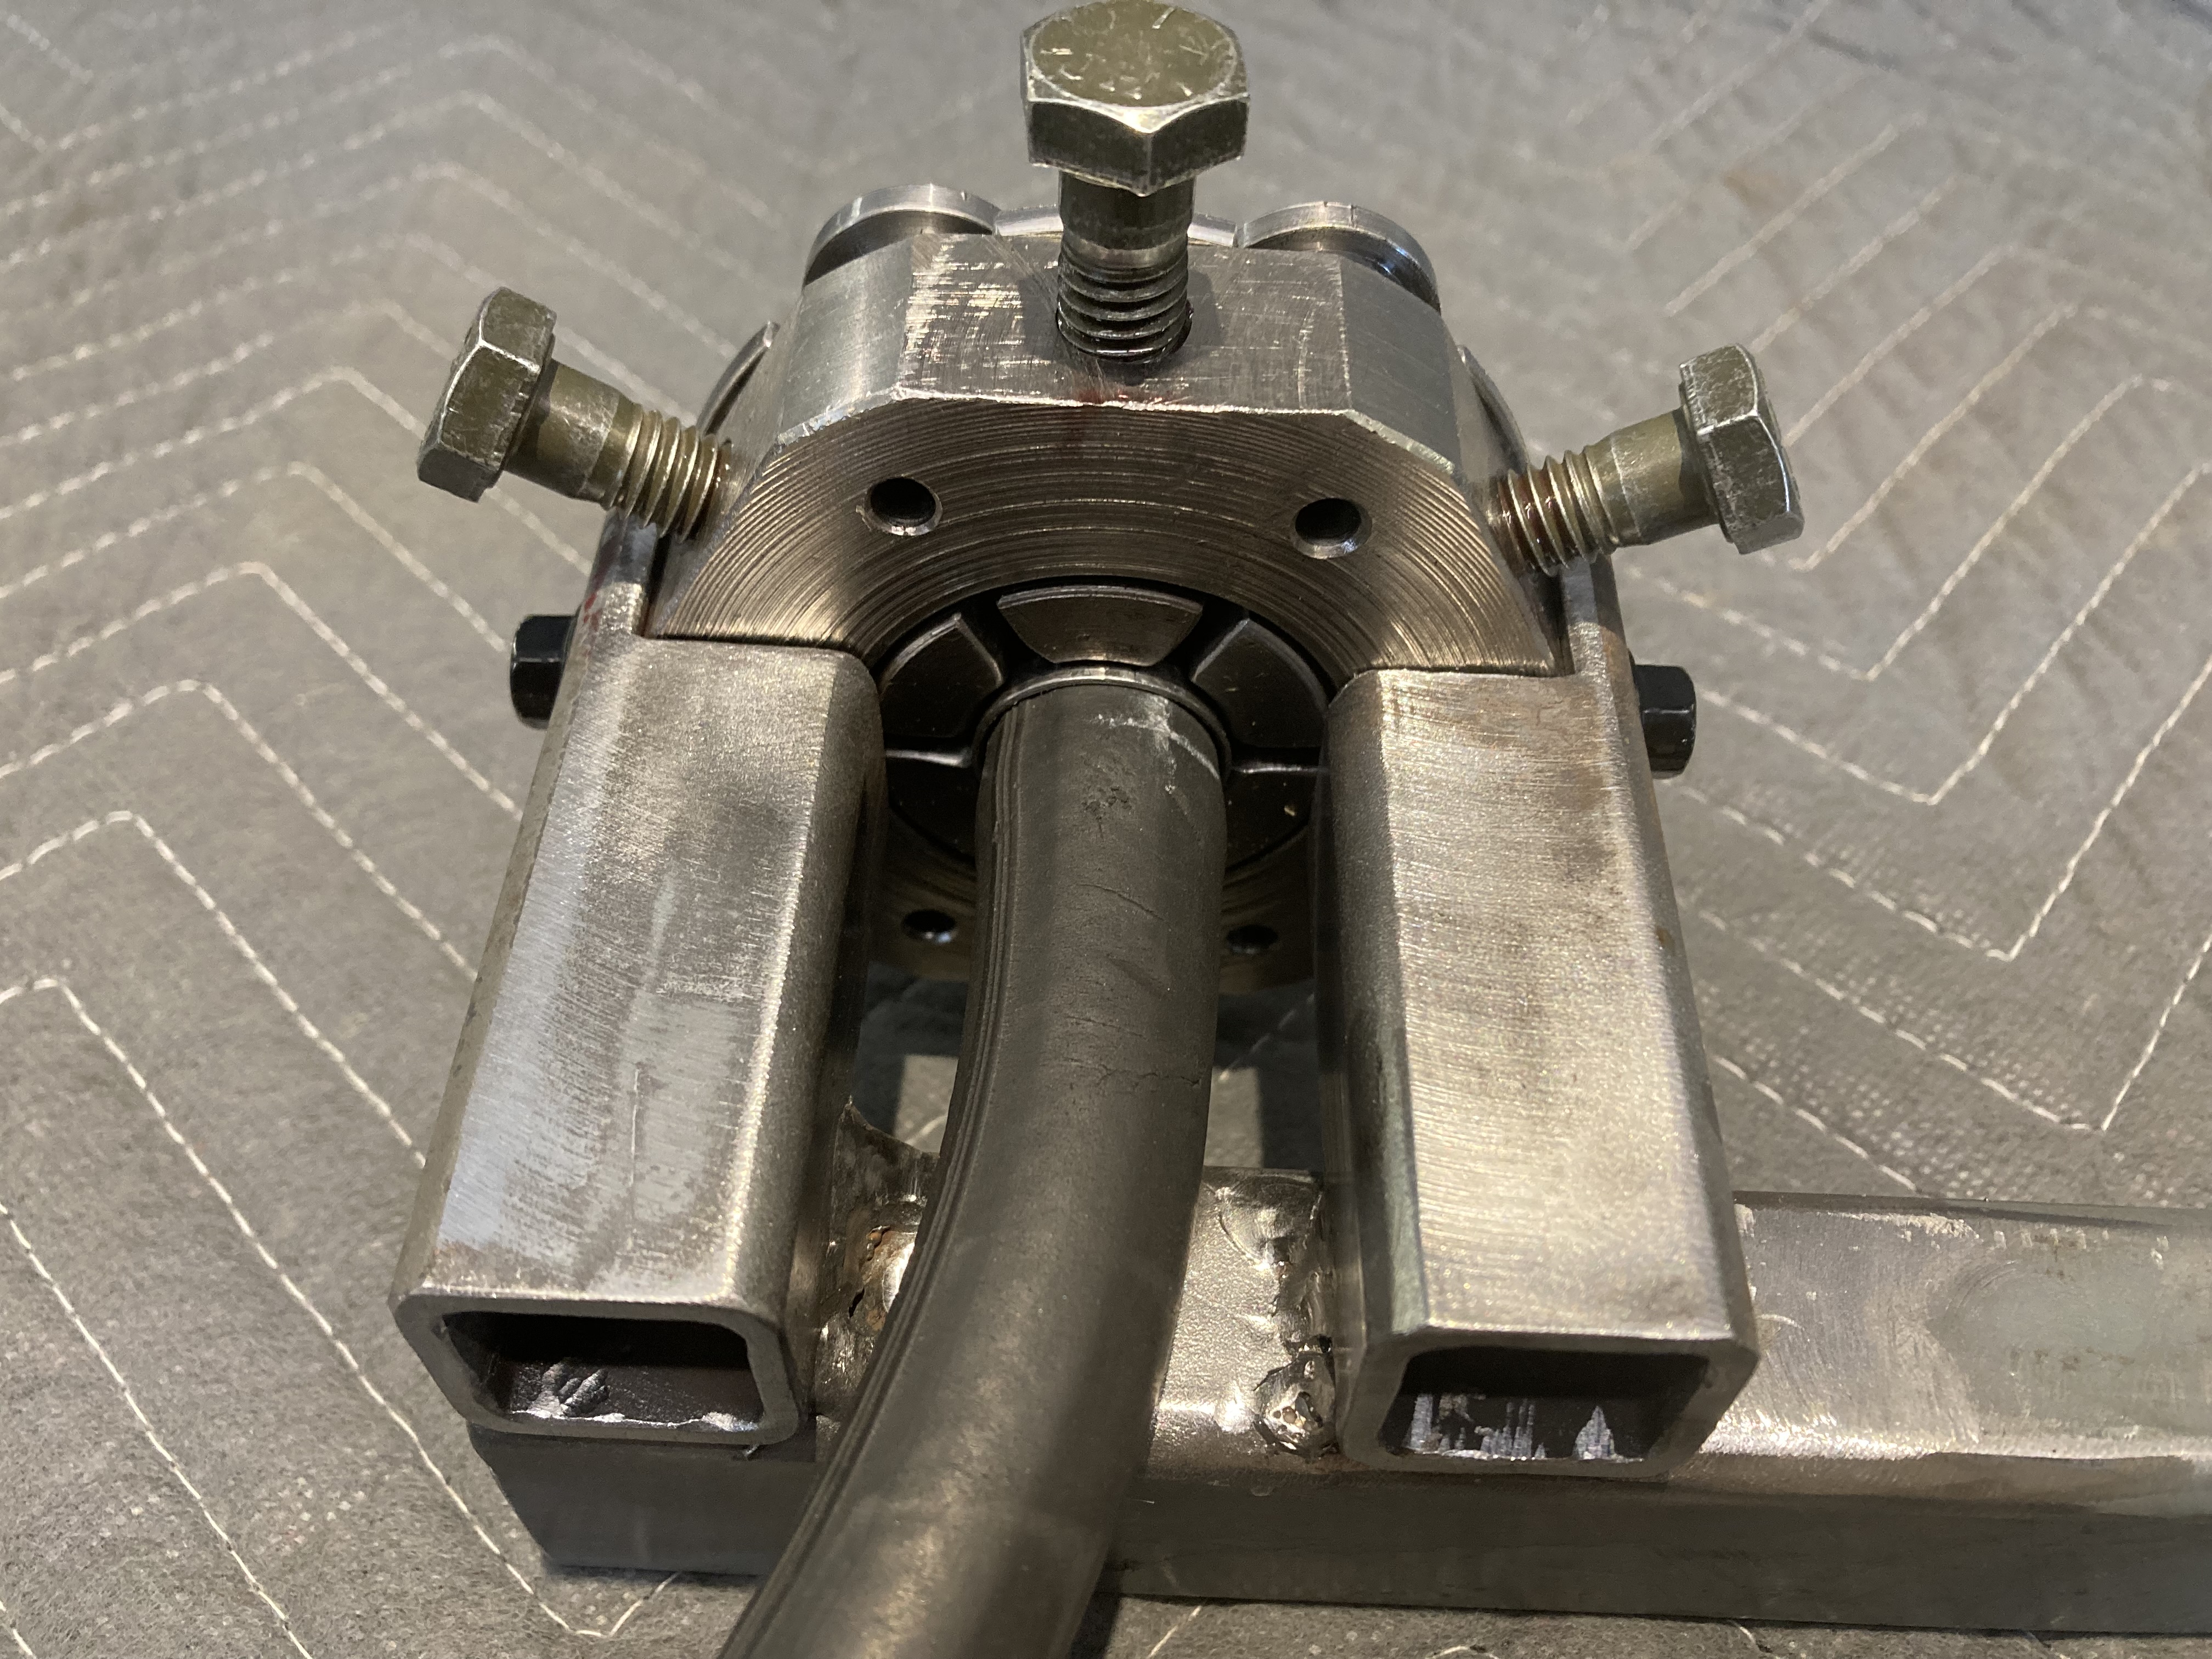
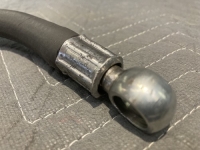
Hose and ferrule before crimp, top view
...bottom view
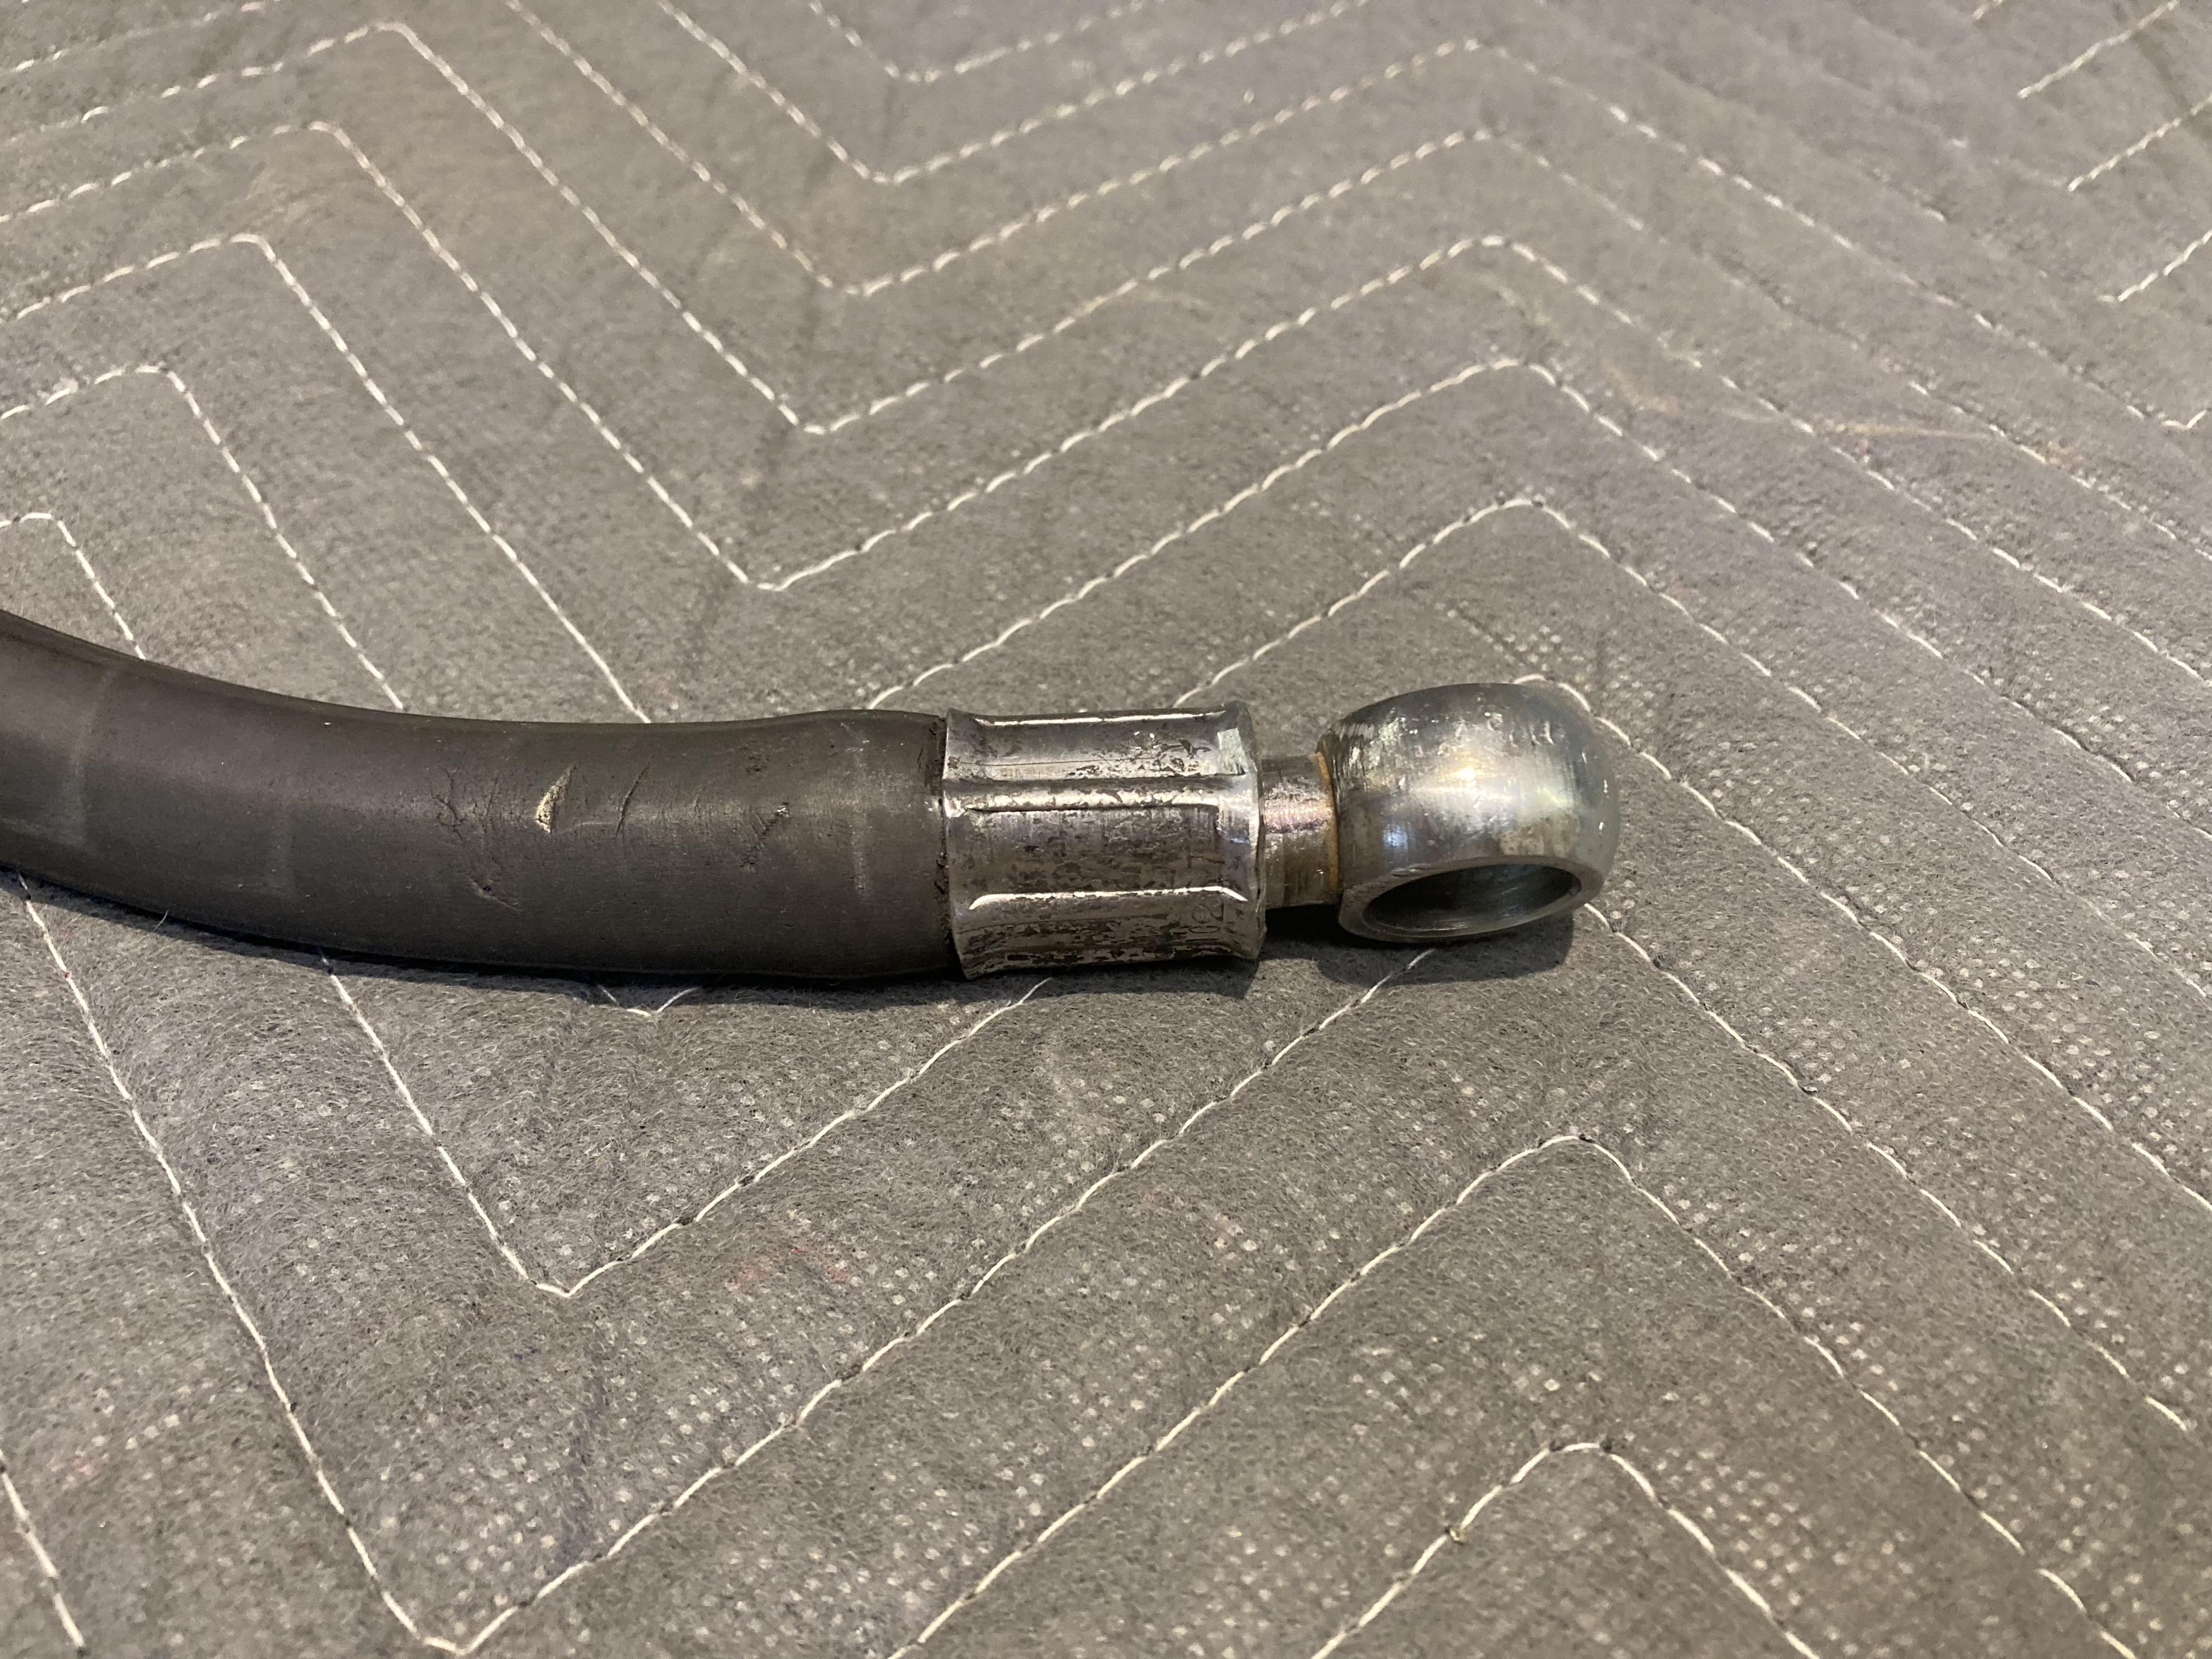
Crimped assembly
close-up view
The reason it looks rough is because, as mentioned above, no turning was done to the OD
I think it will hold the 1500 psi.


 Reply With Quote


Bookmarks